Tables…they’re not always the most exciting thing in the design world. But they’re so useful for those times when you have a heap of content that needs to be organised. Tables can be used to bring some order to content that might be tricky to digest, and we’re here to tell you how you can create tables that not only function well, but look amazing…
Open the document you’re working on or a new blank page in InDesign.
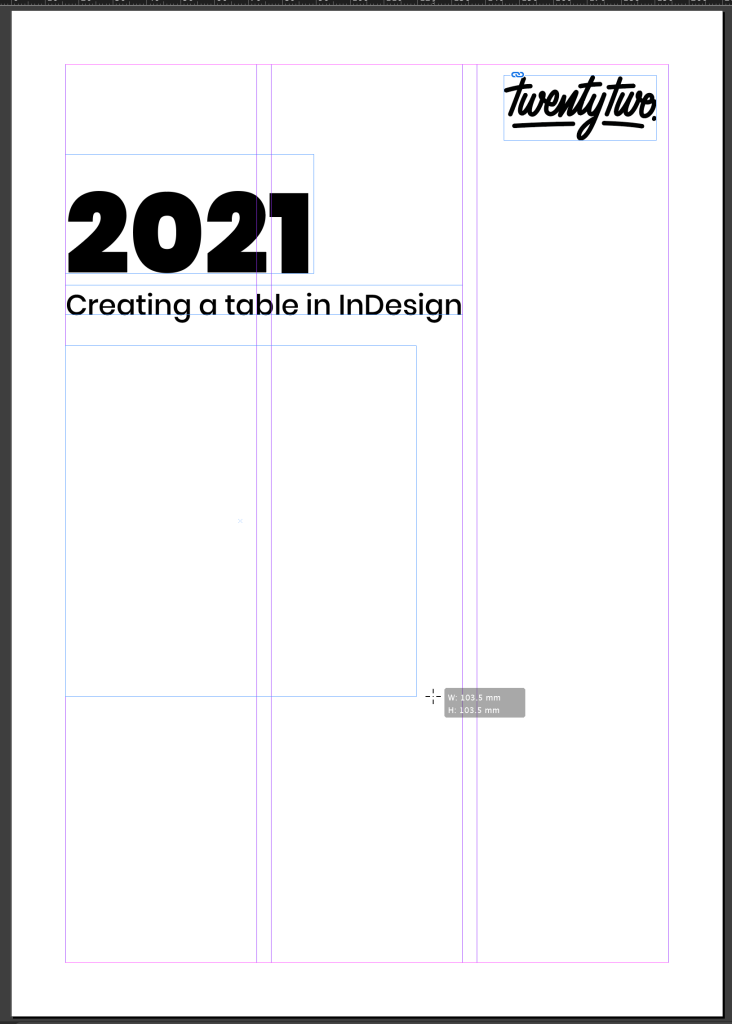
Click on the ‘Type’ tool from the tool bar. Click and drag the box to the appropriate size.

In the top menu bar, click ‘Table’ then ‘Insert table’. A window will appear to input the amount of rows and columns required. Don’t worry – you can add more or less at anytime.

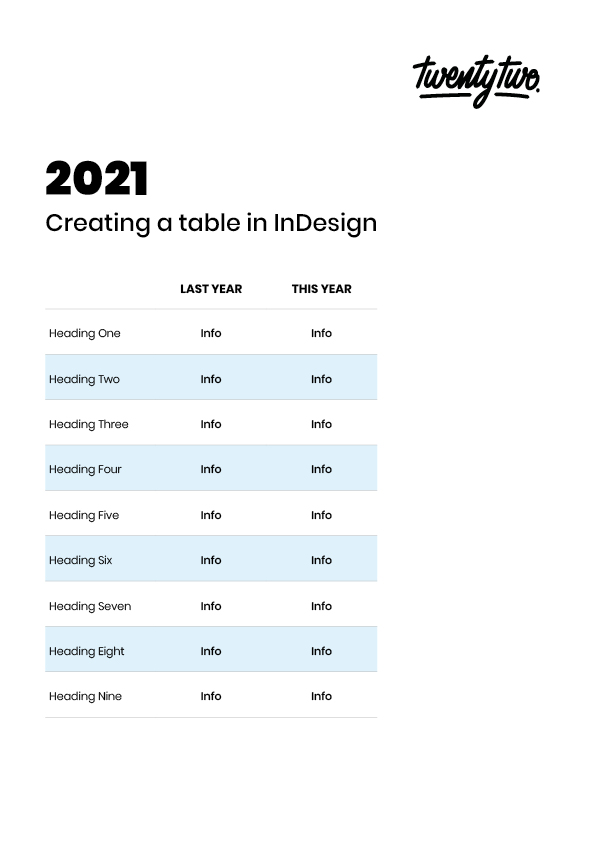
You should end up with something like this. At this stage, add your data or information to the table.
To make it more visually impactful, change the font, size and colour as you would normally using the menus top left of the workspace bar.
To increase the height of the table cells, highlight the appropriate rows and columns and click ‘Exactly’ in the drop down in the menu bar and adjust the height in the box to the right. You can increase the width of the rows and columns using the box directly below.

The highlighted blue box selects individual lines in the table. The outer blue box is always the outer edge of your selected area, whether it’s one cell or a whole row. Selecting the inside lines that are grey, selects the inner lines in the table.
This guide gives you the basics to be able to develop your tables further. Once you’ve nailed the basics, you can explore the features under the ‘table’ tab and experiment. Soon you’ll be on your way to making a table look like a smart piece of design – rather than something that’s just purely functional.